Have you ever wondered what makes a wooden creation truly special? It’s not just the design or the materials—it’s the right equipment that brings your vision to life. Whether you’re crafting a simple wooden car or an intricate dollhouse, the tools you choose play a crucial role in shaping your masterpiece.
Woodworking has a rich history, and many hobbyists today draw inspiration from the setups of decades past. From a reliable saw to a precise drill, these essentials ensure both safety and precision. They also help balance creativity with practicality, especially in smaller workspaces.
Choosing the right woodworking tools can inspire confidence and efficiency. Instead of relying on too many power tools, focusing on a few high-quality items can make all the difference. Let’s explore the must-haves that can elevate your crafting experience.
Key Takeaways
- The right tools are essential for creating quality wooden items.
- Balance creativity, safety, and precision in your projects.
- Focus on a few high-quality tools rather than too many power tools.
- Portability and efficiency are key for small workspaces.
- Drawing inspiration from traditional setups can enhance your craft.
Understanding the Basics of Handmade Toy Crafting
Crafting handmade toys is more than just a hobby—it’s an art form that connects generations. Each piece carries a story, shaped by the care and creativity of its maker. Whether you’re a beginner or an experienced crafter, the process of bringing a toy to life is both rewarding and inspiring.
Exploring the art of toy making involves more than just assembling parts. It’s about understanding the materials, like wood, and how they can be transformed into something magical. Many artisans draw inspiration from vintage setups, where traditional techniques were used to create timeless designs.
Exploring the Art of Toy Making
The creative process begins with a vision. From sketching designs to selecting the right materials, every step requires attention to detail. Using natural dyes and locally sourced wood, artisans can enhance the aesthetic appeal of their creations. This approach not only ensures durability but also adds a unique touch to each piece.
Benefits of Working with Wood
Wood is a versatile material that offers both beauty and strength. Its natural grain and texture make it ideal for crafting toys that are safe and long-lasting. Unlike mass-produced items, handmade wooden toys are built to withstand the test of time. They also encourage imaginative play, making them a favorite among children and collectors alike.
By embracing traditional woodworking techniques, you can create toys that are not only functional but also meaningful. This craft connects the past with the present, offering a sense of fulfillment that goes beyond the finished product.
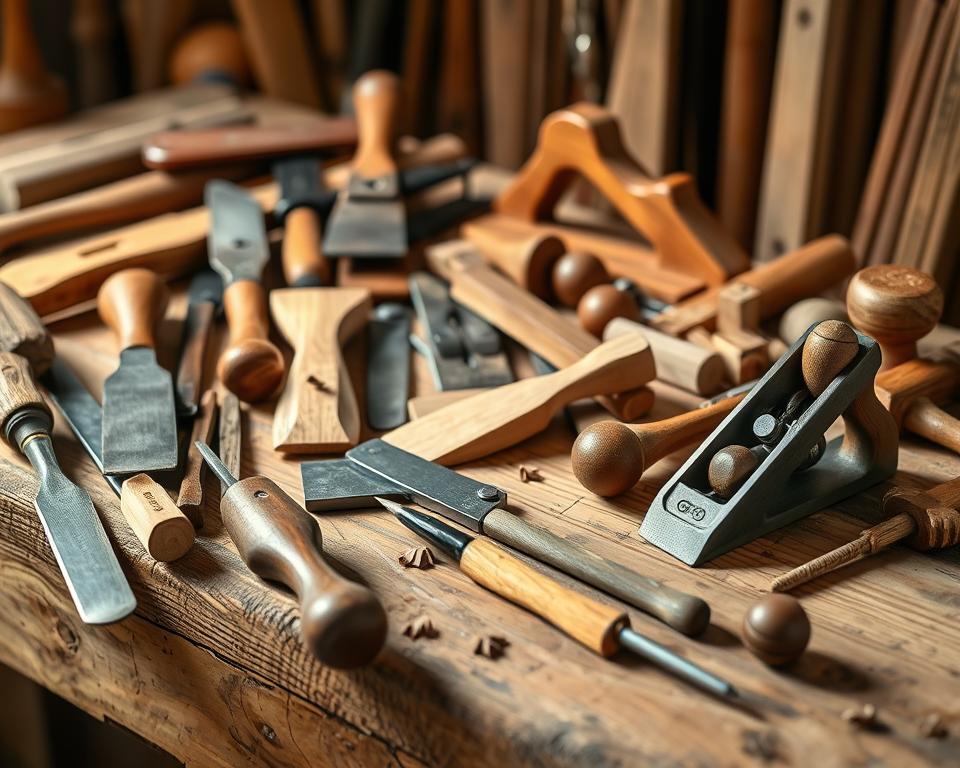
Essential Hand Tools for Toy Making
The secret to crafting timeless wooden toys lies in the tools you choose. From precise cuts to smooth finishes, the right equipment ensures every piece is both safe and beautiful. Let’s explore the must-haves for your workspace.
A high-quality saw is indispensable for clean, accurate cuts. Whether you’re using a traditional handsaw or a scroll saw, precision is key. These tools allow you to shape wood into intricate designs, making them perfect for detailed projects.
Another essential is a reliable drill. Whether you’re creating holes for assembly or adding decorative elements, a drill ensures your work is both functional and polished. Pair it with a set of miniature files for smooth edges and fine details.
Wood selection plays a crucial role in ensuring child-friendly designs. Opt for wood with a tight, straight grain for cleaner cuts and durability. Avoid pieces with many knots to maintain structural integrity.
- Saws: For precise cuts and intricate designs.
- Drills: Essential for creating holes and adding details.
- Files: Perfect for smoothing edges and fine-tuning.
- Clamps: Ensure pieces stay in place during assembly.
Balancing hand tools with occasional power tools can enhance efficiency. For example, a portable drill can save time, while a handsaw offers greater control. This combination allows you to tackle a lot of projects with ease.
Finally, safety gear like goggles and dust masks is a must. These protect you from wood particles and ensure a smooth, worry-free crafting experience. By focusing on quality and precision, you can create toys that are both beautiful and durable.
Assessing Workspace and Portability Needs
Creating a functional and inspiring workspace is key to successful toy crafting. Whether you’re working in a small garage or a corner of your living room, the right setup can make a lot of difference. It’s not just about the size of your area but how you use it.

Maximizing Limited Workshop Space
Working in a compact area doesn’t mean sacrificing quality. Start by organizing your tools and materials efficiently. Use wall-mounted shelves or pegboards to keep your workspace clutter-free. This allows you to focus on your piece without distractions.
Consider multi-functional furniture, like a foldable workbench. This saves space while providing a sturdy surface for cutting and assembling. Lighting is also crucial—bright, well-lit environments reduce errors and enhance precision.
Choosing Portable and Benchtop Options
For those who need flexibility, portable tools are a game-changer. A compact saw or drill can be easily stored and moved as needed. Benchtop options, like a mini lathe, offer stability without taking up much room.
When selecting power tools, prioritize those with adjustable settings. This ensures you can handle different wood types and project sizes. Always balance mobility with performance to maintain high-quality results.
- Organize tools vertically to save floor space.
- Invest in foldable or multi-functional furniture.
- Choose portable tools for flexibility and convenience.
- Ensure proper lighting for safety and precision.
By optimizing your workspace and selecting the right tools, you can create beautiful toys even in limited areas. A well-planned setup not only boosts efficiency but also inspires creativity.
Planning Your Toy-Making Projects
Planning is the backbone of any successful toy-making project. Whether you’re crafting a simple car or an intricate dollhouse, a clear plan ensures every piece fits perfectly. Start by setting your goals and sketching your design. This step helps you visualize the final product and avoid costly mistakes.
Setting Project Goals and Designs
Begin with a vision. What do you want to create? Sketching your design on paper or digitally can help you refine your ideas. Veteran toy makers recommend starting with detailed drawings. This approach ensures you have a roadmap to follow, reducing errors during the crafting process.
Consider the size and complexity of your project. Simple designs are great for beginners, while intricate ones challenge experienced crafters. Use templates or stencils to guide your cuts and ensure consistency. This method saves time and materials, making your work more efficient.
Importance of Precise Measurements
Accurate measurements are crucial in toy making. Even a small error can affect the fit and function of your piece. Use a reliable ruler or measuring tape to mark your wood before cutting. Double-check your measurements to ensure precision.
For complex cuts, like compound angles, planning is essential. Veteran crafters suggest using jigs or guides to maintain accuracy. These tools help you achieve perfect fits, especially in joinery. Taking the time to measure correctly minimizes waste and ensures a polished final product.
- Start with detailed sketches to visualize your design.
- Use templates or stencils for consistent cuts.
- Double-check measurements to avoid errors.
- Invest in jigs or guides for complex cuts.
By planning carefully, you can manage both the creative and technical aspects of your project. This balance ensures your toy is not only beautiful but also functional. Remember, a well-thought-out plan is the first step toward crafting something truly special.
Balancing Power Tools and Hand Tools
Combining the efficiency of power tools with the precision of manual techniques can elevate your crafting experience. This balance ensures both speed and finesse, allowing you to create detailed and durable toys with ease.
While power tools like drills and saws save time, manual techniques add a personal touch. For example, a benchtop drill can create perfect holes, while a hand file smooths edges for a polished finish. This combination is ideal for projects requiring both speed and detail.
When to Use Power Tools Safely
Power tools are excellent for repetitive tasks, such as cutting multiple pieces of wood or drilling holes. However, safety is crucial. Always wear protective gear, like goggles and dust masks, and follow the manufacturer’s guidelines. For instance, a table saw should be used with a push stick to keep your hands safe.
Compact benchtop tools, like a mini drill press, are great for small workspaces. They offer stability and precision without taking up much room. These tools are perfect for hobbyists who need flexibility without compromising on quality.
Integrating Manual Techniques for Finesse
Manual tools shine when precision is key. A hand saw allows for intricate cuts, while chisels and files help refine details. For example, creating press-fit designs often requires the control that only manual tools can provide.
Combining both types of tools can lead to outstanding results. Use a drill for initial holes, then switch to a hand file for fine-tuning. This approach ensures every piece fits perfectly, enhancing the overall quality of your project.
- Power tools save time on repetitive tasks.
- Manual tools add precision and a personal touch.
- Always prioritize safety when using dangerous equipment.
- Compact benchtop tools are ideal for small workspaces.
- Combining both types ensures efficiency and finesse.
By balancing power tools with manual techniques, you can achieve both speed and precision. This approach not only enhances your crafting experience but also ensures your toys are safe, durable, and beautifully crafted.
Safety and Precision in Woodworking
Crafting safe and precise wooden toys requires attention to detail and the right approach. Every piece must be carefully designed and assembled to ensure it’s both functional and safe for children. This section covers essential practices to achieve these goals.
Ensuring Child-Safe Toy Designs
Safety is the top priority when creating toys for children. Avoid sharp edges and small parts that could pose choking hazards. Use wood with a smooth finish and ensure all joints are secure. Press-fit joinery is a great alternative to screws or nails, reducing the risk of injury.
Always test your designs for durability. Drop tests and stress tests can help identify weak points. This ensures the toy can withstand rough play without breaking. Safety isn’t just about the final product—it’s also about the process. Wear protective gear like goggles and dust masks to protect yourself while working.
Techniques for Accurate Cuts and Assembly
Precision is key to creating high-quality toys. Start by measuring your wood carefully. Use a reliable ruler or measuring tape to mark your cuts. Double-check your measurements to avoid errors. Even a small mistake can affect the fit and function of your piece.
For complex cuts, use jigs or templates. These tools help maintain accuracy, especially when working with small or intricate designs. A saw with a fine blade is ideal for detailed work. Always cut slowly and steadily to ensure clean edges.
Assembly requires the same level of precision. Use clamps to hold pieces in place while you work. This ensures a tight fit and reduces the risk of gaps. For holes, a drill with adjustable settings is essential. It allows you to control the depth and diameter, ensuring perfect alignment.
- Test designs for durability with drop and stress tests.
- Use press-fit joinery to avoid screws or nails.
- Measure twice, cut once to ensure accuracy.
- Use jigs or templates for complex cuts.
- Clamp pieces during assembly for a tight fit.
By focusing on safety and precision, you can create toys that are both beautiful and durable. These practices ensure every piece is crafted with care, providing hours of safe play for children.
Creative Techniques for Enhancing Toy Durability
The finishing touches on a wooden piece can transform it from ordinary to extraordinary. A well-crafted toy not only looks beautiful but also stands the test of time. By using creative techniques, you can enhance both its durability and aesthetic appeal.
Finishing Techniques and Edible Oil Finishes
One of the most effective ways to protect and beautify wood is through edible oil finishes. These natural oils, like linseed or walnut oil, penetrate the grain, bringing out its richness. They also create a protective layer that resists moisture and wear.
To apply an edible oil finish, start by sanding the toy until it’s smooth. Wipe away any dust, then use a clean cloth to rub the oil into the surface. Let it soak in for a few minutes, then wipe off the excess. Repeat this process for a deeper, more durable finish.
Here are some key steps to achieve a smooth, child-safe finish:
- Sand the wood thoroughly to remove rough edges.
- Apply thin, even coats of oil, allowing each layer to dry completely.
- Buff the surface gently for a soft, natural sheen.
Traditional methods, like using beeswax or shellac, are still popular for their durability and eco-friendliness. Modern alternatives, such as water-based polyurethane, offer quicker drying times and added protection. Both approaches have their merits, so experimenting with different finishes can help you find the perfect one for your project.
Finishing isn’t just about protection—it’s an artistic element that adds character to your toy. Whether you prefer a matte, satin, or glossy look, the right finish can make your creation truly unique. Always prioritize safety by choosing non-toxic, food-grade products.
If you encounter issues like uneven drying or streaks, try sanding lightly between coats. This ensures a smooth, professional result. With patience and practice, you’ll master the art of finishing, creating toys that are both durable and beautiful.
Budget-Friendly Strategies for Quality Tools
Finding the right equipment doesn’t have to break the bank. With a little planning and creativity, you can build a collection of reliable tools that fit your budget. Whether you’re crafting a small wooden block or a detailed project, these strategies will help you save without compromising on quality or safety.
Selecting Cost-Effective Equipment
Start by prioritizing multi-functional tools. A good drill with adjustable settings can handle a lot of tasks, from drilling holes to driving screws. Similarly, a high-quality saw with a fine blade ensures clean cuts in various wood types. Look for brands like DeWalt or Bosch, which often offer reliable options at reasonable prices.
Secondhand tools can also be a great investment. Many seasoned hobbyists sell their gently used equipment at a fraction of the cost. Check local classifieds or online marketplaces for deals on items like saws or drills. Just make sure to inspect them for wear and tear before purchasing.
Here are some tips for building a budget-friendly toolkit:
- Focus on multi-purpose tools that can handle multiple tasks.
- Invest in critical items like a drill or saw first, then upgrade less essential tools later.
- Look for sales or discounts on reputable brands.
- Consider secondhand options for significant savings.
Portability is another factor to consider. Compact, benchtop tools are ideal for small workspaces and often cost less than larger models. For example, a mini drill press offers precision without taking up much room. This approach ensures you get the most value for your money.
Finally, always prioritize safety. Even on a budget, invest in protective gear like goggles and dust masks. These items are essential for a worry-free crafting experience. By making smart choices, you can create beautiful, durable wooden items without overspending.
Inspiring Stories and Real-Life Toy Maker Experiences
Behind every wooden toy lies a story of creativity and dedication. From vintage designs to modern innovations, makers around the world share a passion for crafting timeless pieces. These stories not only inspire but also teach valuable lessons about overcoming challenges and pushing creative boundaries.

Take Eric von Stein, for example. His work with AI-generated toys blends technology and nostalgia, creating designs that evoke the charm of the past. His Instagram account, Waxy Fruits, showcases how traditional techniques can merge with modern tools to produce something truly unique.
Learning from Past and Current Makers
Historical successes like the Slinky and Hula Hoop remind us that great designs stand the test of time. These toys were not only innovative but also deeply connected to the needs and desires of their era. Today’s makers draw inspiration from such classics, blending old-school craftsmanship with new tools like the scroll saw and drill.
Community forums and blogs are treasure troves of advice. Many makers share how they’ve tackled challenges, from selecting the right wood to perfecting intricate cuts. One maker described how a simple saw adjustment transformed their project, proving that even small changes can make a big difference.
- Draw inspiration from historical successes like the Slinky or Hula Hoop.
- Use community advice to refine your techniques and tool choices.
- Experiment with blending traditional and modern methods for unique results.
- Celebrate the stories behind your creations—they’re what make them special.
Every maker’s journey contributes to the evolution of toy-making techniques. Whether you’re a beginner or a seasoned crafter, these stories remind us that creativity knows no bounds. So, pick up your drill, grab your wood, and start crafting your own inspiring tale.
Conclusion
Embarking on a crafting journey can be both fulfilling and inspiring. Choosing the right tool, like a saw or drill, ensures your projects are safe and beautiful. Precision, safety, and creativity are key to every step.
Plan smartly by balancing efficiency with finesse. Explore creative finishing techniques to enhance durability and appeal. Remember, budget-friendly options can still yield professional results when chosen wisely.
Join the vibrant community of crafters and share your success stories. Experiment, learn, and enjoy the rewarding process of bringing your ideas to life. Start today and discover the joy of creating something truly special.
FAQ
What are the must-have tools for crafting wooden toys?
Essential tools include a scroll saw, drill, sandpaper, and clamps. These help with cutting, shaping, and assembling pieces safely and precisely.
How do I choose the right size for my woodworking projects?
Start by measuring your design carefully. Use a ruler or tape measure to ensure accuracy. Smaller projects often require finer tools like a scroll saw for detailed cuts.
Can I use power tools for toy making?
Yes, power tools like a drill or scroll saw can save time and effort. However, always prioritize safety and use them for tasks that require precision or strength.
What finishing techniques are safe for children’s toys?
Opt for non-toxic finishes like edible oil finishes or beeswax. These are safe for kids and enhance the durability of the wood.
How can I maximize space in a small workshop?
Use benchtop tools and portable options like a scroll saw. Organize your workspace with shelves or pegboards to keep tools accessible and save space.
What’s the best way to ensure precise measurements in woodworking?
Always double-check measurements with a ruler or caliper. Mark your cuts clearly and use clamps to hold pieces steady while working.
Are there budget-friendly options for quality woodworking tools?
Yes, brands like Ryobi and Black+Decker offer affordable yet reliable tools. Look for sales or consider second-hand options for cost-effective solutions.
How do I balance power tools and manual techniques?
Use power tools for heavy-duty tasks and switch to manual methods like sanding or hand carving for finer details and finesse.
What safety tips should I follow when making toys?
Always wear safety gear like goggles and gloves. Ensure edges are smooth and avoid small parts that could be choking hazards for children.
Where can I find inspiration for toy-making projects?
Explore online communities, woodworking blogs, or social media platforms like Pinterest. Learning from experienced makers can spark creativity and provide valuable tips.