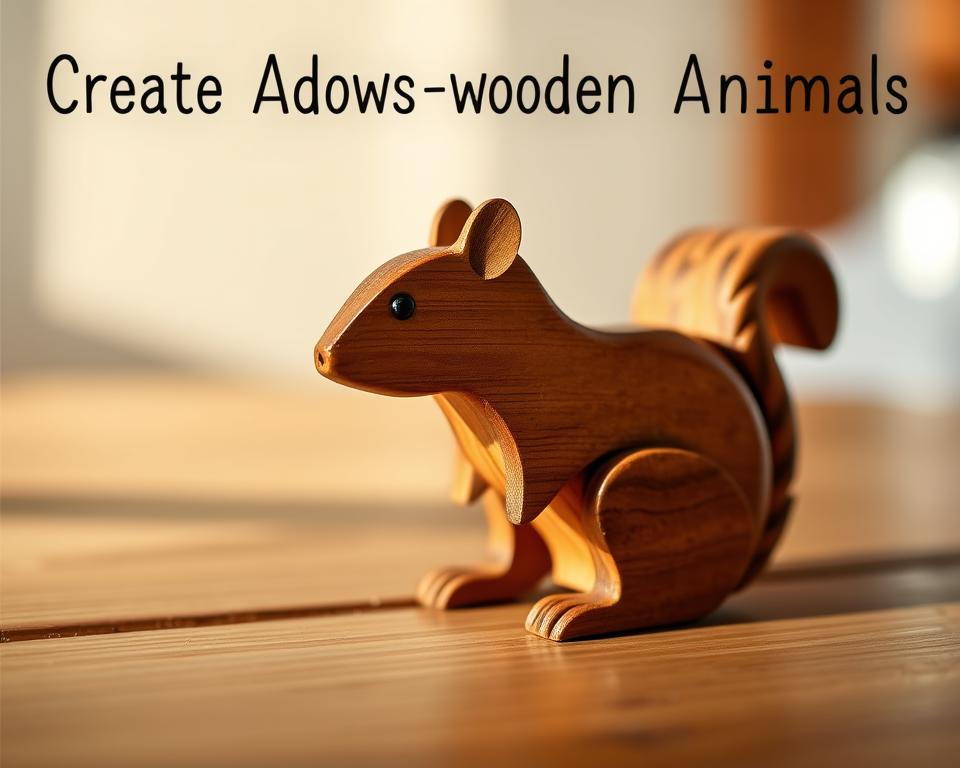
Have you ever wondered why wooden toys hold a special charm that plastic ones often lack? There’s something timeless about the natural feel and design of these pieces that sparks joy in both kids and adults alike.
This DIY project is perfect for crafters of all levels. Using simple tools like a jig saw and leftover wood scraps, you can bring your imagination to life. Add a splash of acrylic paint, and you’ll have a unique toy that’s both functional and beautiful.
Every curve and shape is crafted with care, making each piece one-of-a-kind. Whether you’re making a gift or just exploring your creative side, this project is a fun way to spend an afternoon.
Key Takeaways
- Wooden toys offer a natural and timeless appeal.
- This DIY project is suitable for all skill levels.
- Simple tools and materials make it easy to start.
- Each piece is unique and crafted with care.
- Perfect for gifts or personal creativity.
Materials and Tools for Your Wooden Animal Project
Starting your DIY project requires gathering the right materials and tools. Whether you’re a beginner or an experienced crafter, having the essentials on hand ensures a smooth and enjoyable process.
Essential Wood and Paints
For this project, you’ll need quality wood like leftover 2×4 boards or natural Sitka spruce. These materials are easy to work with and give your piece a polished look. Acrylic paints are ideal for adding color, offering a smooth, semi-transparent finish that enhances the details.

Choosing the Right Cutting Tools and Accessories
Precision is key when shaping your design. A jig saw or table saw is perfect for making clean cuts. Accessories like spiral cutting bits and sanding bands help refine edges and achieve smooth shapes. Don’t forget sandpaper for finishing touches!
Using Clamps and Workbench Setups
Safety and stability are crucial. Use clamps to secure your workpiece and a solid workbench or table to prevent slips. This setup ensures precision and reduces the risk of accidents, especially when handling sharp corners.
- Quality wood like 2×4 boards or Sitka spruce is ideal.
- Acrylic paints provide a smooth, vibrant finish.
- Jig saws and spiral cutting bits ensure precise cuts.
- Clamps and a sturdy workbench enhance safety and accuracy.
- Attention to detail results in a polished final product.
With the right materials and tools, your DIY project will transform basic wood into striking designs. Take your time, and enjoy the process of bringing your vision to life!
Planning and Designing Your Animal Figures
The design phase is where your vision begins to take shape. Start by choosing the type of animal you want to craft. Draw inspiration from nature, online platforms like Pinterest, or your own imagination. This step sets the foundation for your project.
Once you’ve decided, sketch your ideas on paper. Use a black pencil for clarity, focusing on the shape and proportions. Organic, rounded designs are easier to work with and look more natural. This approach is perfect for beginners.
Next, transfer your sketch onto the wood. Place the paper over the surface and trace the outline with a pencil. For a clean transfer, you can use household items like acetone and a kitchen towel. This ensures your design is precise and ready for cutting.
Measure and mark the wood carefully. Proper planning helps avoid mistakes during the shaping stage. Take your time to ensure every curve and edge is well thought out. A well-planned piece will look polished and professional.
Remember, this phase is all about creativity and precision. Whether you’re crafting a fox or an owl, a thoughtful design makes the process enjoyable and rewarding. Let your imagination guide you!
Step-by-Step Guide to create wooden animal figures
Ready to dive into the hands-on part of your DIY journey? This guide will walk you through each step, from setting up your workspace to adding the final touches. Let’s make your vision a reality!
Setting Up Your Work Space and Safety Precautions
Start by preparing a stable and spacious work area. Secure your wood piece with clamps to prevent slipping. Safety is key—wear goggles and a dust mask to protect your eyes and lungs from debris.
Ensure your tools are within reach and your workbench is sturdy. A stable setup not only improves precision but also reduces the risk of accidents. Remember, a little preparation goes a long way!

Executing the Rough Cut and Shaping Process
Begin with the rough cut using a jig saw or multi-tool. Move at a steady pace, letting the tool do the work. Avoid forcing it, as this can lead to uneven cuts or damage to the wood.
Once the basic shape is cut, focus on refining the curves and edges. Use spiral cutting bits to smooth out sharp corners. This step lays the foundation for your design, so take your time to get it right.
Adding Detail with Sanding and Carving Techniques
Next, sand the piece to soften edges and create a smooth finish. Start with coarse sandpaper and gradually move to finer grits. This ensures a polished look and prepares the surface for detailing.
For intricate features like the head or nose, use hand tools like a Dremel VersaTip. These tools allow for precise adjustments, bringing your animal design to life. Check for consistency in curves and shapes as you go.
- Set up a secure workspace with clamps and a sturdy table.
- Wear safety gear like goggles and a dust mask during cutting.
- Use a jig saw for clean, steady cuts and spiral bits for shaping.
- Sand thoroughly to smooth edges and prepare for detailing.
- Add intricate features with hand tools for a polished finish.
Each step builds on the last, ensuring your piece looks professional and well-crafted. Enjoy the process, and don’t hesitate to make adjustments as needed. Your hard work will pay off in the end!
Finishing Touches: Painting, Detailing, and Sealing
Bringing your design to life with vibrant colors and subtle details is the most rewarding part of this project. This stage transforms a simple piece into a heartfelt keepsake. Let’s explore how to add those final touches that make your work truly special.
Applying Paint and Adding Facial Features
Start with a base coat of acrylic paint. Water it down slightly for a smooth, semi-transparent look that lets the natural grain of the wood shine through. This technique adds depth and character to your piece.
Next, focus on the facial features. Use a fine pen or a Dremel tool to add eyes, noses, and other details. Precision is key here—take your time to ensure every curve and shape reflects your vision.
For a cohesive look, apply consistent colors across multiple figures. This creates a harmonious set that’s perfect for display or gifting. Remember, patience and steady hands make all the difference.
Final Sanding and Protective Finishing
Once the paint is dry, lightly sand the surface to soften any sharp corners and give it a slightly worn, rustic appearance. This step enhances the handmade quality of your work.
For added durability, consider applying a protective finish. Options like polyurethane or lacquer not only preserve the colors but also protect the wood from wear and tear. Apply multiple thin coats for the best results.
- Use a base coat to highlight the natural wood grain.
- Add facial features with precision tools for a polished look.
- Sand lightly to smooth edges and create a rustic finish.
- Seal your piece for long-lasting protection and durability.
These finishing touches not only complete your project but also preserve its charm for years to come. Enjoy the process, and take pride in your unique creation!
Conclusion
There’s nothing quite like the joy of turning raw materials into something special. From selecting the right wood to planning, cutting, and shaping, this project is a journey of creativity and craftsmanship. Adding details and finishes brings your animal design to life, making it a unique piece to treasure.
This DIY endeavor is perfect for beginners and seasoned crafters alike. It’s a chance to slow down, focus, and enjoy the process. The satisfaction of holding a handmade item is unmatched, and the skills you gain along the way are invaluable.
We encourage you to experiment with designs and finishes to make each piece your own. Share your creations and inspire others to try this rewarding project. Thank you for following along—your next masterpiece is just a few steps away!